
Return to QRP index page
|
QRP Equipment
   There is a wide range of equipment available for the QRPer. This includes 100 watt transceivers than can be wound down to QRP, purpose built QRP and portable radios, build-it-yourself kits and building gear from scratch. Keep reading if you want to know what to buy or build and get results with QRP. QRO equipment wound back to QRP
Today's 100-watt transceivers can often be wound back to deliver QRP power levels.
Their multimode multiband coverage and other features make them attractive to the operator who wishes
to try QRP but also retain QRO capabilities.
A particular benefit is their impressive array of interference-beating features, such as noise blankers,
notch filters, variable tuning rates, IF shift and digital signal processing. For this reason, this gear
provides excellent results when trying to receive marginal signals from distant QRP stations. If you are only
going to have one HF transceiver there's a strong case to make it a 100 watt unit as these deliver superior value
on a watts per dollar basis.
What are the disadvantages of using 100 watt transceivers? Compared to dedicated QRP radios they are bulky,
heavy and draw high currents on receive. It is not uncommon for a modern HF rig to draw 1 to 2 amps just
on receive, ie more than what most QRP radios use on transmit. While not a problem for home use, this last factor
alone makes large transceivers a poor choice for portable work due to the weight of batteries required.
I briefly compare the features of current model 100 watt transceivers here.
Commercially-available QRP equipment
Today's main choices include the Yaesu FT-818ND, the Icom IC-705 and the Elecraft KX3. All three are multiband and all mode.
But transistorised QRP gear started in a more modest way. I'll fill you in on some history before discussing the latest stuff.
When QRP first took off in the late 1960s, spurred by the increasing availability of solid state RF devices and the
rediscovery of direct conversion receivers, a number of American manufacturers produced equipment specifically for QRPers.
Heathkit produced the HW7/8/9 series of CW only transceiver kits during the 1970s and 1980s. Of these the HW7 drifted
and had a poor receiver, the HW8 was a much improved design and is still usable while the HW9 had more bands and
mixed reviews.
SSB QRPers of that era could buy Ten Tec's Argonaut 505, 509 and 515 models. Though lacking today's refinements,
they performed well and are still sought after despite their large (and not particularly rugged) enclosure, crude
tuning dial and odd choice of power and antenna connectors. $200 to $250 is a fair price on the used market for
a working Argonaut 509.
Japanese QRP rigs, designed for their 10 watt novice licence, were imported into Australia in big numbers and frequently
appear secondhand. Examples included the Yaesu FT-7, Yaesu FT-77S and Kenwood TS-120V.
These rigs are still good performers, but lack 160 metres, some HF bands, and digital signal processing found
on newer transceivers. By today's standards they are bulky and are best suited for home or car use.
Less well known QRP rigs of the 1980s include models by Shimizu Denshi, MFJ, Mizuho and the ironically-named
Tokyo Hy-Power. These may only cover a single band and be CW or SSB only. They also had analogue VFOs and dials.
They were available for only a short time and/or were rarely available outside Japan.
The first 'modern' QRP radios, with all-HF coverage, digital dials and CW/SSB modes were the 'cube' Index Labs QRP Plus
and the rugged SGC-2020 transceivers. These came out in the 1990s. There was also a blossoming of QRP kits from
various US QRP clubs, including from designers who would later form Elecraft (discussed later).
Mainstream ham manufacturers reentered the QRP field from the early 2000s. Possibly the longest running and most successful
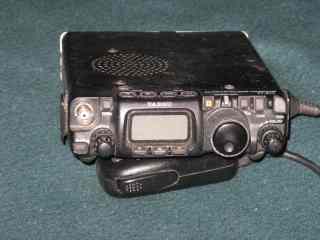
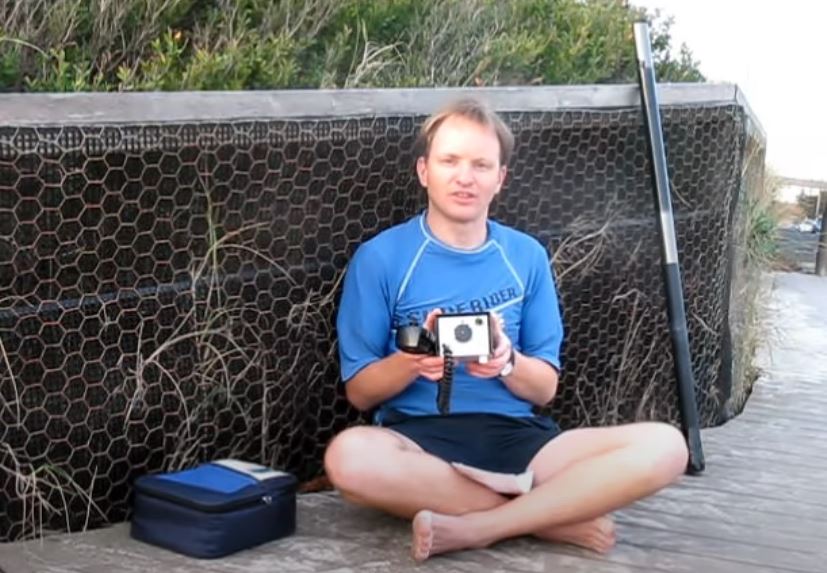
QRP transceiver ever is the Yaesu FT-817 (pictured above). Unlike previous QRP rigs, the '817 operates on all bands
between 1.8 and 450 MHz and has a compartment for optional internal batteries. It provides 'big rig' performance in a
tiny package and has provoked renewed interest in back-pack and pedestrian mobile operation. The FT-817 came out in
2001. The FT-817ND was a minor update a few years later with more robust final amplifier stage. That was in production for
the better part of 15 years. It was only stopped when the FT-818ND came out in 2018. The difference between that and the
FT-817ND are not worth mentioning; if you have an FT-817ND you wouldn't bother updating to the '818. "If you're on a good
thing stick to it" seems Yaesu's motto and they've certainly earned it with the 817ND/818ND series as you've seen in
many of my videos.
Icom took a different tack. They came along with the IC-703 in 2003. Maybe they saw the success that Yaesu was having with the
'817 and wanted to join the party. It's HF-50 MHz only and cosmetically looks like the hugely successful '90s era IC-706 mobile rig.
The IC-703 served a slightly different market to the Yaesu. It was chunkier but ran 10 watts with what some considered a better
receiver. And its display wasn't so tiny. A SOTA operator or VHF freak would pick the smaller Yaesu while a drive-in portable
operator, or someone who wanted a low power HF rig for home, might opt for the less fiddly Icom.
The FT-817 became the 817ND, then the 818, and continued to sell well. Even though it was by now a 15-year old design there was nothing comparable,
especially on a bands per dollar ratio. I like the 817/818 format a lot for portable and pedestrian mobile, though some find the controls and menus
fiddly. More about the FT817/818 series here.
Kenwood's best years in amateur radio were behind it, with it being a very distant third of the 'big 3'.
Ten Tec in the States was like a classic hits radio station, with its big numbers from the '70s, '80s and '90s. It did however
offer economical rebadged Chinese gear like the nice little R4020 40 & 20m CW transceiver
for a while. Icom stood by, concentrating on its DSTAR offerings on VHF and UHF. However, as you'll see later, it would return to
the portable QRP market after attending to some unfinished business with SDRs in the lower to middle price point.
The favourite choice, amongst those with the money, was something from Elecraft. Elecraft replaced Ten Tec as the main US-based
maker of HF ham gear. Elecraft started before the turn of (this) century with the K2 kit radio. Inititially low power CW only you could
get upgrades for SSB and 100 watts. It was highly regarded for its performance particularly on receive. Two years later came the K1,
a smaller CW-only rig for 2 to 4 bands. From there Elecraft branched in two directions with the KX series. The KX1 was low drain
CW-only for the backpacker/summits crowd while the KX3 was getting more modes, more bands with a better receiver and higher output
power than the FT-817ND. Shaped more like a brick, it had a bigger display than the Yaesu but wasn't cheap, and in my view was less
robust. Elecraft later released a cheaper KX3 lookalike called the KX2 with a smaller case and fewer bands. That did everything
most portable operators needed. Especially when imported into Australia its price was high so many either stuck with the
long-in-the-tooth but versatile FT-817ND/FT818 or tried some of the cheaper Chinese QRP rigs coming out (eg the Xiegu series). If small size
and low drain are top considerations the LNR CW-only MTR series is something else to consider.
What was Icom doing? They were developing what was to become the IC-7300 SDR-based home station transceiver. Situated at the lower-middle
price range, this proved a sales sensation from its release in 2016. With that sorted they returned to the QRP market with the new
IC-705. That's an HF/50/144/432 MHz portable SDR QRP rig with the same touch-screen as the '7300. Its main competitor is the Elecraft KX3,
with a similar 'house brick' shape and battery arrangement. The '705 runs 10 watts output and has a lot of features the Yaesu lacks.
On the other hand it's much more expensive and lacks the dual antenna sockets. The IC-705 has been a big success for Icom and, with the
FT-818 no longer available, is the only HF/VHF/UHF QRP rig available today.
Quality, reliability, finish and customer service varies, especially from the newer manufacturers. Then there's overall value for money.
It's always a good idea to to read reviews on sites such as eHam.net before purchasing.
QRP kits
QRP constructors have a variety of kits from which to choose. These range from no-frills crystal-controlled transmitters
to multiband CW/SSB transceivers. QRP kits can be club projects for members or be available on the commercial market.
Some are even designed and produced here in Australia.
The results obtained from a good kit on the right band make this choice worthwhile, especially if less experienced or time-poor.
Things to think about when choosing a kit include:
* Modes and bands provided
Avoid both extremely simple and extremely complex kits unless you're experienced and know what to expect. Most
people find there is a 'sweet spot' where kits are neither too expensive nor complex yet achieve many contacts.
Bare bones 'minimalist' kits (such as the well-known Pixie series) have rudimentary receivers,
weak transmitters and a fixed operating frequency. Getting contacts is frustrating because other stations must find you rather than you find them. They may use
only three or four transistors and only put out a few hundred milliwatts. Transmit output filtering, keying quality and receiver selectivity may also be compromised.
Only attempt this type of kit if you are looking for a novelty project or are willing to call for long periods between contacts. Alternatively build the circuit from
scratch, not using a printed circuit board. That gives flexibilty to add improvements. If your
heart is still set on buying a kit, pay that little bit extra and get one that will be a pleasure to operate for years to come.
Good candidates for a first-up QRP kit
Single band is preferred as more bands means more complexity. Select a popular band that will be open throughout the solar cycle and produce contacts at the times you
plan operating. VKs shouldn't rely on reports from overseas - activity locally is less, and a minimalist rig that will get contacts in more populated countries may not as much here.
40 metres is my recommendation, providing easy and regular communication up to approximately 1000 kilometres. 20 metres has the added excitement of working DX but contacts are much harder
to get and there are fewer conversations between VK stations. 80 metres is good if most of your operating is at night, though voice is preferred over CW due to higher activity.
Higher HF bands like 17 to 10 metres offer great DX opportunities but do not open frequently enough for them to be your only band. Even 20 metres can be a struggle. It can get busy during good conditions (and contests!)
but there is less chat and less local working than 80 and 40 metres. Its DX culture can make 20m contacts harder than on the lower HF bands.
Transmitter output power should exceed 1 or 2 watts. Anything less is frustrating. A kit with a BD139 or IRF510 final transistor should put out enough power whereas one with a 2N2222 will be too weak.
A degree of frequency agility is essential. The better kits will have a DDS VFO will cover all the band. If a kit has a digital frequency display the chance is it also has a DDS.
A second and simpler choice is a well built ceramic resonator or wide swing VXO with two crystals and a good variable capacitor. This can cover a worthwhile section of band.
A ceramic resonator can span 100 to 200 kHz while a wide swing VXO should cover 15 - 50 kHz. Kits that use varactor diodes and potentiometers for VXO tuning may cover a lesser range than those with
air spaced variable capacitors.
Check that supplied crystals or resonators suit local activity before buying kits that only cover a band segment. For instance US CW QRPers generally use higher frequencies than those
in most of the rest of the world on 80 and 40 metres. A 7040 kHz crystal, for example is fine for various digital modes but not necessarily for CW. CW transceiver
kits are available from some of the suppliers listed below. Any of these would be an ideal for trips and draw less current than prebuilt commercial rigs.
DSB kits are simple and and fun. An SSB kit is a step up and more advanced. That is unless the board is pre-assembled like with the Bitx and uBitx. There you just need to find a
case and connect the off-boards parts. You get much of the kit building experience without putting as many hours into construction. More on the uBitx here.
Multiband QRP transceiver kits represent another advance. Unless largely pre-assembled (like the uBitx) they are recommended for more advanced constructors only. They have become more
prevalent thanks to wide-range DDS VFOs and put the assembly of multiband gear within reach of more.
If a kit radio appeals but you don't want to build it check to see if the manufacturer offers a pre-built version. This option would also suit Australian Foundation Licence
amateurs who cannot legally make their own transmitter.
Another option is to scour the hamfests and second hand ads. Brands to look out for include Heathkit, Small Wonder Labs, Hendricks, Oak Hills Research, Elecraft and OzQRP.
Information on these is widely available on the web.
You'll also find reviews of prebuilt and kit QRP rigs on eHam, while some have their own email list that discuss their features, quirks and modifications in detail.
Current QRP kit suppliers
The following are known suppliers of QRP kits a step or more up from the cheap Pixies and their variants. Listing here does not imply endorsement.
Bliss Radio (SSB/CW transceiver)
HF Signals (Bitx/uBitx)
Kits and Parts (VXO kits)
LZ2JR (RGO One)
Minikits (mainly VHF & up)
QHR kits by EA3GCY (Iler and others)
QRP Labs (QCX and WSPR kits)
Walfords (Variety available)
WA3RNC (40m QRP CW)
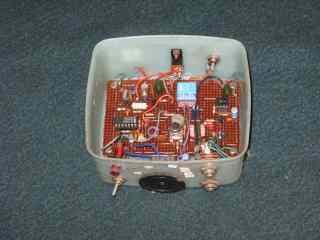
Homebrew QRP equipment
QRPers also have the option of building
their own rigs. And a surprising number
do. Homebrewing is the way to go if you
want a rig that is personalised to your interests and preferences. For example, you may require a particular
band combination and an unusual ability to switch audio bandpass and notch
filters for best reception. A homebrew
rig may also be a platform for development of a high performance receiver, or
novel transmitter arrangement, for example.
Some general components for homebrew transmitters
and transceivers can be obtained from the usual parts suppliers, while the more
specialised parts (toroids, variable capacitors, NE602s, etc) can be found at
amateur hamfests, junk sales, eBay or purchased by mail from QRP clubs or specialist online suppliers.
A key decision for the constructor is
whether to construct a transmitter or transceiver. A transceiver is easier to operate and less bulky - major
advantages for portable operating. However
a transceiver is more complex, especially where many stages are common to both
the transmitter and the receiver.
A transmitter is recommended over a
transceiver for the beginner as it uses fewer parts and is easier to
troubleshoot. In many QRP
transceivers, the receiver may account for two-thirds of all components used. Leaving out the receiver makes for a simpler
and quicker project that is more likely to work first time. Also, the use of an outboard receiver
means that the transmitter/receive frequency offset circuit can be dispensed
with, further simplifying circuitry. Another point in favour of the separate transmitter/receiver
approach is that most QRPers will already have a suitable communications receiver available. The performance and
ease of use obtained will typically be better than that from a simple homebrew receiver.
A good plan is to build the transmitter in
an oversize box. Once the transmitter
has been got working, it can be expanded.
For instance, a direct conversion receiver can be added. Or an extra band. Or, maybe even the parts required to generate a DSB or SSB
signal.
What type of transmitter circuit should you start with? Sure, it's very easy
to build a simple 80 metre QRP Morse Code rig. Just one or two transistors and
a 3.58 MHz TV colourburst crystal, and you're on the air. But will the rig
sound OK? Will you get contacts? Or will the rig cause you to give up QRP
because no one is responding to your CQs?
This website is devoted to practical QRP.
QRP that works. QRP that's fun. And to get the most enjoyment from QRP, you need
to know something about the capability of your equipment so that you don't
expect too much and become disappointed when your hopes do not materialise.
Be selective about the type of QRP rigs you build. It must be fairly simple and not require too many hard to get parts. Secondly, it must be put out enough power to be heard on the air. Thirdly, it should be frequency agile over at least a
segment of the band. The following sections explore these points in depth.
The author's minimum standards for homebrew rigs should also assist the
builder to cull the good from the useless in the hundreds of circuits
available.
What is sufficient power? Though this
depends on the distances you wish to work, I would say that an inexperienced
amateur aiming to make regular contacts with powers of less than one or two
watts on any HF band is going to be disappointed. Sure those milliwatt rigs you
see described in foreign magazines and on the web do work, but remember that
Europe and the USA have far more amateurs per square kilometre than we have in
Australia. As it's so easy to build one or two watt transmitters that there is
little sense in settling for less unless you specifically want to do
experiments in milliwatt communications.
I would recommend powers of 1-2 watts as a practical minimum assuming
you are using a reasonably efficient antenna (eg a full-sized dipole). Though
there will be times when more power than this will be required (eg when static
is bad), you should be rewarded by reasonably frequent contacts up to several
hundred kilometres, and the occasional two or three thousand kilometre contact
with 1-2 watts. On 40 metres 1 - 2
watts is again sufficient for distances of up to about 1000km, and the
proportion of Q5 signal reports tends to be higher than on 80.
On 20m and up, Europeans and Americans can be worked from Australia
at the 5-watt power level, especially if portable overlooking water. Don't expect
reliable DX contacts from home with this level with low dipole or vertical
antennas, however.
FT8 is a highly effective mode, and contact up to about 3000 km are possible almost
every day with QRP power levels. JS8 is less active but is recommended as a more personalised alternative.
WSPR isn't a contact mode as such but is highly efficient. If you get a buzz from a 20 milliwatt signal
being detected on the other side of the world then it could be the QRP mode for you.
SSB requires more power for comparable results, but even so 5 or 10 watts can be rewarding, even in
the middle of the 20 metre 'kilowatt alley' when conditions are favourable. Otherwise you might only be
able to work as far as 2000 - 3000km. Very low output powers can be very successful on the higher bands,
but you need to be there at the right time - the kilowatters may enjoy DX for hours, but the QRPer must be there when the
band is optimum.
Then there's frequency agility - being able
to move around the band, rather than being stuck on a single frequency. Many
home brew QRP transmitters are crystal-controlled. Most of them also sit on the
shelf gathering dust and are seldom used. Why? Being locked on one frequency
severely hampers your operating success. You could be calling CQ, but not be
getting any replies. Then 5 kHz up the band, you hear another station also
calling CQ. If you were frequency agile, you could move to the other station's
frequency and most likely obtain a contact. Instead, you remain on your
frequency, hoping that the other station will not get a reply, stop calling,
tune around and eventually find you. A lot of people build simple rigs, have
one or two contacts, and not use them again because getting contacts is sheer
hard work.
The disadvantages of crystal control are
greatest with QRP. Unless someone happens to start calling on 'your' frequency,
the only way to get contacts is to call CQ yourself. As many people tend to
reply to CQs from stronger stations only, your chances of getting a reply are
reduced if your signal is weaker. The successful way to get contacts with QRP
is to 'search and pounce'. Either reply
to CQ calls from other stations (you know at least someone is listening for
your call), or 'tail-end' contacts that are concluding. Both of these
techniques are only really possible if you can move frequency. And, if there is
not much activity around, and you do wish to call CQ, chances are better if the
call can be made on a perfectly clear frequency. The probability of finding
such a frequency is of course much greater if you can operate everywhere in the
band.
Another limitation of crystal control is
that your crystal may not be in the most active part of the band. For example,
3.58 MHz TV colourburst crystals are conveniently in the middle of the 80 metre
Novice allocation. However, most CW activity is below 3.550 MHz. Operators
seeking CW contacts will not often be tuning across 3.58 MHz. So, the chances
of getting a response are reduced as you are not where most potential contacts
will be listening.
Even crystal-control on the so-called International QRP
Frequencies (eg 7.030 & 14.060 MHz) can be very limiting, at least in
VK/ZL. These frequencies are sometimes
clogged by strong digital mode QRM, and are made useless as a result. This disadvantages the constructor who has
built a rockbound 'OXO' or 'Cubic Incher' rig that is stuck on the single
frequency. Though authors describing
such projects invariably report great success with their one or two transistor
creation, bear in mind that they in Europe or North America, where the amateur
population is at least 20 times Australia's.
Attempts by Australian amateurs to operate such transmitters often lead
to fruitless CQs, followed by grave disappointment with the lack of contacts
achieved.
To summarise, because 'search and pounce'
(answering calls and tail-ending) is the best way to get contacts, frequency
agility is essential for the QRPer. Use
nothing less than a VFO, good VXO, or stable variable frequency ceramic
resonator oscillator to succeed with QRP.
Morse transmitters are the simplest to build. A simple VXO CW transmitter can be built in an afternoon and work stations near and far. Watt for watt they are more efficient for longer distance communication, especially on crowded HF bands like 20 metres.
If you are building a voice rig, should you
choose AM, double sideband suppressed carrier (DSB) or SSB? An SSB rig is a challenging project, and is not recommended unless you've already built CW and DSB transmitters. So, for the newcomer (and even for many experienced amateurs), the choice is between AM and DSB.
AM was used prior to the advent of SSB, and
still has a following on some bands (especially 160 metres, to a lesser extent
on 80 and 40). However, many SSB rigs do not have AM and it may not always be
easy to resolve a weak AM signal on an SSB transceiver. Because AM signals include a carrier that
does not contribute to the intelligibility of the signal, AM is less efficient
than SSB, and more transmitting power is required to make oneself heard. However, AM still has its uses. The speech
quality of AM is generally better than DSB or SSB. Where you have a small group
interested in local contacts only (such as within a country town or small
city), a homebrew AM rig would be a fun project, particularly on 160 or 10
metres where there is plenty of band space. Ranges of up to about 5km can be
achieved with powers of under a watt.
DSB has an equivalent bandwidth to AM, but
has no carrier. Thus it is a more efficient mode. As well, DSB is fully
compatible with modern SSB equipment, and unless you tell them, many SSB stations
will not know that you are using DSB. The combination of a direct conversion
receiver and DSB transmitter is highly recommended for the Novice wanting to
build an HF voice station, and because of the similarity of DSB and SSB. Also, DSB transmitters can later be upgraded
to SSB by adding extra circuitry. DSB is particularly recommended for bands
such as 160, 80, 40 and 10 metres due to the ample space on these bands.
A few people build digital modes transceivers. The key requirement is good frequency stability. This is possible with
either a crystal or a DDS-controlled oscillator. The latter has a crystal as a frequency reference but provides often
useful frequency agility. But if you're lucky you may be able to find specially cut crystals for digital mode frequencies.
Unlike with CW or phone you are not at a disdadvantage as activity on each digital mode is normally confined in a 2 kHz
slot and you can do the fine tuning needed via your computer.
Key digital modes to consider for QRP include WSPR, FT8 and JS8. A very simple direct conversion receiver and computer
can decode their signals provided the local oscillator is stable enough. Add a few extra stages to make it a DSB transceiver.
This has limitations, for instance it transmits signals on two frequencies instead of one. And the receiver may suffer from
interference on the 'audio image'. However there are ways around it including using the phasing method to null out the unwanted
sideband. I have done videos demonstrating homebrew digital mode receivers and transceivers. Also some kits are available if you
prefer that to building from scratch.
Some top picks for QRP transmitter and transceiver projects here.
Minimum standards for homebrew rigs
The following are sensible minimum standards for any homebrew or kit QRP rig you build. My experience is that all must be followed to have successful and enjoyable results with QRP.
1. Power output at least 1-2 watts
2. At least some frequency agility in a popular part of the
band
3. CW and/or DSB/SSB and/or digital modes operation.
If you see any design or kit that does not
meet the above, have second thought about building it, even if it appears cheap
and simple. Even if it works according
to the book, you will soon become disappointed with is limitations.
1. Power output
Look for a design with a reasonable power output transistor. A BFY51, 2N3053, 2N3866 or 2N4427 in the transmit final stage should have an output close to 1 watt. 2N3553, BD139, IRF510 or IRF511s are all capable of power outputs between 2 and 4 watts. Two lower power transistors can be wired in parallel (with suitable emitter resistors) to produce more output. A 2N2222, 2N3904 or BC548 as the final amplifier is a sure sign
that the rig is nowhere near powerful enough.
2. Frequency agility
A free-running VFO or synthesised VFO usually provides full band coverage, but can be difficult for the newcomer to get going properly (unless you get a DDS VFO kit). It is not always easy to obtain good frequency stability in a free-running VFO on the higher HF bands, and synthesisers tend to be somewhat complex to build. Nevertheless, a free-running VFO is a good choice for an 80 metre rig provided that care is exercised in its construction.
Cheap ceramic resonators are a good choice on the lower HF bands due to their handy frequencies. A resonator for 3.58 MHz can be swung over 100kHz while a 7.2 MHz resonator can cover 200 kHz. Both tuning ranges span active portions of the voice parts of 80 and 40 metres. This makes them particularly suitable for DSB transceivers, and on 80 metres, CW rigs as well.
Quartz crystals are not recommended on 80 metres as they cannot be shifted very far in frequency. However, at 7 MHz and above, crystal oscillators (VXOs) can be pulled to provide worthwhile coverage of frequencies immediately below the crystal's
nominal frequency. Ranges of 5 to 15 kilohertz can be achieved, depending on the crystal type and the operating frequency. Connecting two crystals in parallal can double pulling range. VXOs are particularly useful for CW/DSB equipment on 40, 30, 20, 17 and 15 metres. However frequency multipliers are required on 12 and 10 metres because of the inability to shift crystals very far when used in their overtone mode.
Unless you are after very low current consumption or 'bare bones' simplicity, modern DDS units are a good choice. A kit unit can simplify construction of an otherwise homebrew transceiver. They offer excellent frequency stability, a wide tuning range and (usually) a frequency offset suitable for superhet or direct conversion transceiver designs. Some are Arduino based, meaning that you can customise things like frequency ranges and tuning steps.
3. Mode
Watts are precious so it pays to use an efficient mode. Contrary to views expressed by many northern hemisphere QRPers this definition need not be confined to Morse or digital modes.
With perseverence good results are possible on SSB at QRP power levels. And DSB can be practical on QRP friendly bands such as 40 metres.
You can recognise a DSB or SSB design by the presence of a balanced modulator stage in the circuit. This is required to null out the carrier that would otherwise be transmitted (as it is on an AM signal). Devices such as the NE602 (also used in direct conversion receivers) can be used. Older designs use other ICs (CA3028 and MC1496) which are less available now. More recently there has been a swing back to two or four diode balanced mixers due to their good performance and low cost.
Like in an SSB rig, power amplifiers used in DSB rigs have to be linear. This means that a power amplifier circuit used in a CW transmitter is normally unsuitable for DSB unless its operation
is made linear. Luckily the same output transistors as in CW rigs can be used but efficiency will be lower.
Digital modes have opened up a new world of transceiver design for QRP builders. For example WSPR provides an ability to set up a low power beacon that can be heard worldwide. FT8 allows 'contacts' with compromised antenna systems. And, JS8 has similarities with FT8 but has a more conversational capability. All these modes are possible with very simple DSB/direct conversion gear though SSB is preferred to lessen potential interference on both transmit and receive.
you may never use. The videos below may be helpful in working out what best suits your needs.
Items were chosen for likely usefulness and a satisfaction rating of 4/5 or better.
|
Books by VK3YE
Ham Radio Get Started (USA)Australian Ham Radio Handbook (Aust) More Hand-carried QRP Antennas 99 things you can do with Amateur Radio Getting back into Amateur Radio Illustrated International Ham Radio Dictionary Make your Passion Pay (ebook writing)
All material on this site |